Cranberry & Apricot Jam Baked Brie

This delicious treat is the perfect snack or appetizer to add to your holiday menu. It's melt in your mouth good and super simple but looks difficult and will impress your guests!

image.jpg

Ingredients: 

  • Puff pastry sheets (comes in a 2-pack but you only need 1) 
  • Craisins - 1/2 cup
  • 1 Egg  
  • Apricot Jam - 1 large spoonful
  • Brie Wheel 8oz  
  • Crackers - we like to pair with Cracked Pepper Water Crackers  

Directions: 

  1. Put 1/2 cup of Craisins into water to soak
  2. Take out the puff pastry to thaw - gently unroll so you don't crack it on the fold lines. It took mine about 20 minutes to thaw enough to roll it out.
  3. Preheat your oven to 350 degrees.
  4. Beat 1 egg and set to the side.  
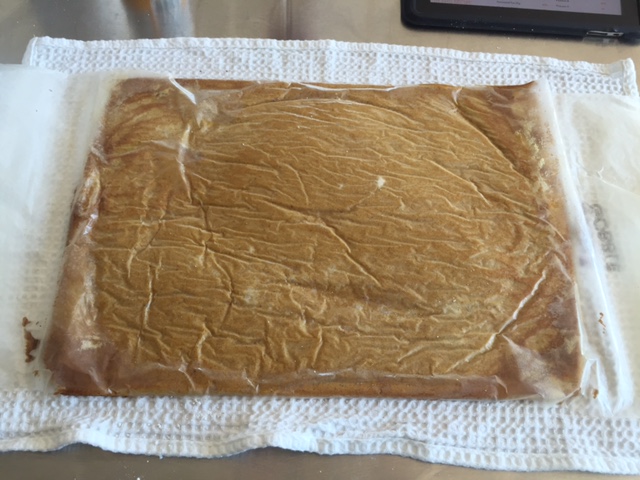
  5. Once the pastry is thawed, sprinkle a little flour on your rolling surface and roll out to smooth all your edges. Mine was about 15" x 15"  
  6. Take a large spoonful of the apricot jam and spoon into the center and then even out in a 4" circle  
  7. Place your Brie wheel right on top of the jam.
  8. Drain the Craisins and place on top of the Brie. 
  9. Brush the four corners of your puff pastry with egg.  
  10. Take the four corners of your puff pastry and gather and the top. Pinch and twist until you have a bonded top. 
  11. Transfer your Brie to a baking sheet which is well oiled. 
  12. Brush the top of the Brie and all over with egg. 
  13. Cook for20-25 minutes.  Watch the top of the puff pastry  to make sure it is not burning on the top.
  14. Let the Brie sit for 5-10 minutes before serving with crackers and a small cheese knife. 

Enjoy!  

image.jpg
image.jpg

Here the craisons are soaking in water which helps let the flavor out.

image.jpg
image.jpg
image.jpg
image.jpg
image.jpg
image.jpg
image.jpg
image.jpg
image.jpg
image.jpg
image.jpg

Spread the Love & Dream Big,

Mrs. Madej

Virginia is for Wine Lovers!

On weekends.. We take party bus limos to vineyards and drink wine, a lot of wine.  

image.jpg

Last weekend a good friend of ours, Sarah H organized a very well planed vineyard tour through Virginia. The group was a great mix of her friends (including her new fiancé, Eli! - congrats to this great couple!), our friends, and my co-worker Nicolas who is here working with us from France.  I have a guilty pleasure enlightening him on all our American pastimes from baseball games, wine tours and soon Thanksgiving. 

image.jpg

We stopped at three vineyards on our tour. The first stop was Boxwood Estate Winery in Middleburg, VA. Reviews - great tour, great tour guide, and decent red wine. Tasting price was a little high but on the plus side, the tour included seeing the room where they bottle their own wine. It felt like we were inside an episode of "How It's Made" which my inner engineer-dorky side secretly loved. We didn't purchase any wine at this stop but our group picture at the "spitter" turned out great! (I guess serious wine tasters do not swallow every sip and instead spit the wine out in this shinny spitter. If they did swallow every sip they would get wine buzzed and not be able to taste the difference.... It's a real shame!)  

The "Cave"  

The "Cave"  

image.jpg
image.jpg
image.jpg
image.jpg
image.jpg
Group shot at the spitter! 

Group shot at the spitter! 

Party bus pause for dancing, sandwiches and a cold beer to wash down the wine. (Because every Brenner-Madej is properly trained in what to bring on a limo road trip)

image.jpg

Second stop was Cana Vineyards and Winery which was also located Middleburg. It was a quick ride so our beers were chugged and we were whisked upstairs for a scenic view of the vineyards. Reviews - no tour, pretty decent wine, reasonable tasting at $11, free wine glass, and breathtaking scenery. Nicolas picked up the Reisling and Rose for Thanksgiving. We are excited to try them again and report back on how they taste when you get more than a 1/4 oz sip. 

image.jpg
Did I mention Sarah's mom, Rhonda joined us? totally in love! If I didn't already have a #1 Mom I would definitely put in a request for Mrs. Hasselmann!  

Did I mention Sarah's mom, Rhonda joined us? totally in love! If I didn't already have a #1 Mom I would definitely put in a request for Mrs. Hasselmann!  

Party bus pause for more dancing, snacks,  throwback 90's music, cleansing our wine pallets with more cold brews and drinking games like Thunder.  

image.jpg

Third stop was Paradise Springs Winery in Clifton, VA conveniently located on our way back toward DC. This placing was poppin'. Cute couples with picnic baskets, families with kids and BYOS (bring your own snacks), and a full bar serving their homemade wine. Our private tasting was held in their wine cellar and we got to taste eight of their different wines. In my opinion* this was the best wine we tasted all day. It was also the most expensive. Most bottles were over $30 but it was well worth the $10 tasting fee to try them all.  

image.jpg
image.jpg

We finished off the event with a return trip on the party bus which may or may not have included some serious group sing alongs. 

*disclaimer - I am no wine expert.  

Have you been to any good wineries in the DC area? List them in the comments below and we will try to stop there on our next Vinyard extravaganza! Till next time blog followers!

Coming Soon - My Thanksgiving Turkey Recipe!  

Spread the Love & Dream Big, 

Mrs. Madej  

BONUS: Pictures from our Sunday recovery brunch at the Kennedy Center Terrace. Big check off our DC bucket list. Great views of my Watergate project, good company, and crab legs for breakfast! 

image.jpg
image.jpg
image.jpg
image.jpg
image.jpg
image.jpg
image.jpg

A Cape Cod Oyster Festival Extravaganza!

This past weekend the Madej's finally made it back up to the Cape for the first time since the big wedding!  As always, this beachy town filled our hearts full of happiness, our bellies full of seafood, and our Cape Coddage home full of amazing company. The weekend flew by but in a short amount of time we were able to get in a full day of backyard games and scallop shucking, take a limo bus trip to the Wellfleet Oyster Festival, and of course hit the beach for some great group shots! See our weekend below as told through photos.

SATURDAY

Backyard games, shucking scallops, eating scallops, and drinking fall beers. (we also found both of Ryan's old hockey helmets....)

Sunday

Wellfleet Oyster Festival including our limo bus transportation home. #responsibleadults 

Monday

Ocean front lunch kind of day :) 

Cape Cod + Good Company + Seafood = Bliss

Spread the Love & Dream Big, 

The Madejs

Pumkin Roll with Cream Cheese Filling

One of Mr. Madej's favorite fall treats....pumpkin roll! When we first started dating I was living in Blacksburg and I decided to master this dessert art form. Come to find out, it is much easier then it looks!  A few tricks and you are on your way to baking this delicious fall treat. Quick tip, we freeze ours in order to snack on it for longer :)

Time: About 1 hour 

Ingredients for Cake:

  • Jelly-Roll Pan
  • Flour (3/4 cup)
  • Baking Soda (1/2 tsp)
  • Baking Powder (1/2 tsp)
  • Ground Cloves (1/2 tsp)
  • Ground Nutmeg (1/4 tsp)
  • Ground Cinnamon (1/2 tsp)
  • Salt (1/4 tsp)
  • Sugar (1 cup)
  • Eggs (3 large)
  • Pure Canned Pumpkin (2/3 cup)

Ingredients for Cream Cheese Filling:

  • Light Cream Cheese (8oz./1 pkg.)
  • Powdered Sugar (1 cup)
  • Butter (1/2 stick)
  • Vanilla Extract (1 tsp)

Directions: * Step by step pictures below

  1. Preheat your oven to 375 degrees
  2. Line your jelly-roll pan with wax paper. Grease the wax paper and sprinkle with flour.
  3. Mix the following in bowl #1
    1. Flour
    2. Baking Soda
    3. Baking Powder
    4. Ground Gloves
    5. Ground Nutmeg
    6. Ground Cinnamon
    7. Salt
  4. Beat the following in bowl #2
    1. Sugar
    2. Eggs
    3. Pumpkin
  5. Combine bowls #1 & #2 and beat until smooth and creamy
  6. (Optional) I have a hand blender- using this causes the cake to be extra fluffy and airy.  I used the hand blender for about 1 min.
  7. Pour the cake batter into your prepared wax lined jelly-roll pan and smooth out.  *Madej Tip - Smack your pan flat on your countertop a few times to even out and make your batter smooth on top. 
  8. Bake your cake for 13-15 minutes. When the cake is ready it should spring up when you touch it. The cake cooks fast so make sure you watch for burning edges.
  9. While your cake is cooking prepare your rolling towel:
    1. Take a clean dish cloth and lay it flat on your prep area.
    2. Sprinkle powered sugar generously over the dish cloth.
  10. Flip the cake over directly onto your prepared dish towel and slowly peal back the wax paper. 
  11. Starting with the short edge - roll the cake and the towel into a roll and put somewhere safe (on a drying rack if you have one) to cool.
  12. While your cake is cooling make your icing. Beat the cream cheese, softened butter, powdered sugar, and vanilla extract in a medium bowl.
  13. Once your cake is cooled all the way through, unroll the cake, spread the icing, and re-roll.
  14. Roll your pumpkin roll with wax paper and place in the refrigerator or freezer.  The roll will be easier to cut once cooled or slightly frozen.
  15. ENJOY!

Do you have a favorite fall recipe?  Leave a comment with an idea or two. There are a few weekends left in the season and we might just try it out as a recipe box edition!

Stay tuned to Meet the Madej's next week - we are headed back to Cape Cod for the first time since the wedding for an oyster festival extravaganza! 

Spread the Love & Dream Big, 

Mrs. Madej

Getting to Know The Madejs - The "Skimm" on Us!

Starting to follow our blog but lack information on who we are?  Here is the "skimm" on us. 

What we are:

  • Totally in love
  • Newlyweds
  • Aunt and Uncle to 3 beautiful nieces, Sophie, Lydia & Eliza 
  • Godparents
  • Dog owners
  • Day drinking champions 
  • East coast travelers 
  • Work enthusiasts
  • Brunching experts
  • Career thriving
  • Beach loving
  • Activity seekers
  • Gym crushers
  • Seafood obsessed 
  • Taylor Kitsch fans
  • Pizza aficionados
  • Rangers, Devils and Giants super fans  
  • Afraid of sharks  😐
  • All of the above with an advance knowledge of beer, non fictional literature (josh), being crafty, interior decorating, throwing an awesome wedding and of course - winning!

Things that we are not:

  • Calm or boring
  • Strapped for cash or rich
  • Parents
  • Professions bloggers.....yet
  • Wine experts
  • Musicians
  • Chopt champions  
  • Graceful losers

What we want to be...one day in the next 5 years:

  • Triathletes
  • Better photographers  
  • Parents (come on people...it's a 5 year plan)
  • Homeowners
  • College debt free
  • Entrepreneurs  
  • Kick ass gardeners/landscapers
  • European travelers
  • Colorado skiers
  • Pacific Ocean swimmers
Photo:  Thanks to Lens Cap Productions 

Photo:  Thanks to Lens Cap Productions 

Follow the real The Skimm… trust us - it's worth 5 minutes of your morning.

Spread the Love & Dream Big,

The Madejs

Our Nautical Budget Friendly Wedding Invitations

Style: Nautical elegance designed by CoppiaCreativa.  Kristy Bauer Saliemo has beautiful designs and I knew they were the perfect fit for our wedding.  We wanted to keep it classy but not so formal that our guests would think they were attending a black tie affair. We found the design we liked listed as an invitation package for purchase. I decided to email Kristy to see if she would be willing to sell us just the digital files and she happily agreed. She was kind enough to help us with the invitation wording, agreed to make our response card "post-card" style by adding our address on the back and also designed us a custom details card. Here is the link to our wedding suite design. The total cost for digital versions of the double sided invitation, the double sided response card, and the custom designed details card was $50.    

Selecting the Envelop Liner: Using inspiration from CoppiaCreativa's designs on Kristy's page I knew we wanted to use a map of Cape Cod for our liner. Using a quick google search I found the map I liked best, copy and pasted it into a word document and printed it on letter size paper 150 times. The map is of Cape Cod, as drawn by architect Walter Gaffney in 1932. I printed them using a color laser printer on standard white printer paper for free!

Printing: The next step was to find a website to print the three invitation components. With some help from family friend, Craig Hartmann we found a paper we liked that had a decent paper weight and it was all systems go. We knew we wanted linen paper to provide a casual texture to the elegant font and after ordering paper samples from multiple companies we chose to use 123 Print. They had the lowest cost with the best 110# textured linen paper selections. The 110# was heavy enough to feel substantial but not as thick as a piece of cardboard. We were able to upload all the digital files easily onto their website and place the order without any assistance. For the wedding invitation we used the 5-1/8" x 7" custom wedding invitation option.  For the response and details cards we used the 5-5/8" x 4" custom postcard option.  We also received 40% off during their wedding invitation sale and 10 days later we had all our invitations in the mail! Total cost for 150 copies of each component came out to $252.00.

Envelopes: Next step - envelope upgrade!  The invitation order from 123 Print included more basic white envelopes than we knew what to do with. I knew we wanted to hand calligrapher the addresses in gold and we agreed that using a navy envelope would really make the design pop.  After some time searching for a great deal we found our envelopes from Paper and More. We selected the A-7 Euro Flap, Dark Blue Metalic envelopes. The cost was $16.99 for 50 and we ordered 3 sets for a total of 150.  I knew we would only send about 110-120 invitations but having 30 spare envelopes was well worth it. While addressing them by hand I made multiple mistakes and had to trash my fair share. By the end I only had one to spare!

metallic_dark_blue_euro_flap_500p_1.jpg

Cost of Invitations:

Digital Design: $50

Printing: $252

Envelopes: $51

Liners: $0

Total Cost for 150 Wedding Invitation Sets: $2.35 each

Embosser: We purchased a very simple address embosser to use on our save the dates and our wedding invitations. One of my bridesmaids, Taylor Berens Crouch recommended this great deal through Horchow. It worked great with the A-7 type envelopes and added the perfect additional custom detail.

* Madej Tip - if you want to emboss your envelops make sure you do this step prior to gluing in your envelope liners :)

Inserting the Envelop Liners: This process was simple but time consuming.  Take your envelope, trace it onto one of your liners, cut it out and glue it into your envelope using a glue stick. I wanted to position the compass centered into the top of the envelope so once I had the map positioned correctly I made a stencil to trace all the other maps. Josh helped trace and I used my steady hand to cut the straight lines. To streamline the process I cut the bottom off all the maps using my paper cutter and made sure the liner extended past where you could see it with the envelope fully open.

* Madej Tip - Glue the liners in after your calligraphy is complete. It took me over a month to finish hand addressing and the few liners that I had glued in started to separate from the envelope. Additionally - you don't want to waste cut out liners on envelopes that you trash due to mistakes.

Paint Pens: For our save the dates I bought gold paint pens from target but they ran out quick, they were expensive and occasionally if pushed down hard enough would bleed in large spots.  I eventually found that the best gold pens to use were actually Sharpie! Sharpie Metallic Fine Point Permanent Markers. You can find them on amazon for $4.50 for a 2-pack.

81ZMzhD53pL__SX522_.jpg

Font for Hand Calligraphy: The cursive font used in our invitations is called Burgues Script.  To buy the font is pretty expensive. I couldn't find it for under $100.  So instead I used this website as I addressed each last name. http://www.sudtipos.com/fonts/97 .  You can "test" the font by typing each name and Sudtipos will digitally show you what the letters will look like. See the example I screenshotted below.  After that... its up to your awesome free handing skills.

font.png
IMG_4247.JPG

Stamps: I've never really loved the idea of "wedding" stamps.  A standard white cake or red roses - none of that really fit with our theme. At the time the post office was offering beautiful New England lighthouse stamps. Each one was breathtaking and totally put the icing on the cake as the finishing touch on our invitations.  If the post office isn't selling a design that fits your invitations, try Ebay.

* Madej Tip - Stamps are expensive.  I did everything I could to make sure our invitations only needed 1 standard stamp. Forever stamps are $0.49 each. If you are going to mail 100 invitations it will save you $50 just in stamps so make sure your invitation weigh less than one. (Don't forget you also have to put a stamp on the return card so it really starts to add up!)  To save paper and to get below the weight limit, Josh and I opted to have our response card - post card style, eliminating the need to include an additional envelope. We also chose to forgo the traditional inner and outer envelopes. We addressed straight onto the envelope we inserted the invitations into.

The end result was beautiful and we received so many compliments on how it all came together. In furture blog posts you will see how we included the Burgues Script throughout more of our wedding stationary to make everything look cohesive and beautiful.

Spread the Love & Dream Big,

Mrs. Madej

image.jpg

Recipie Box - Emily D'Alessandris's Homemade Pesto

It's Emily's 3rd annual 25th birthday and in honor of her special day... a special blog post featuring her homemade pesto!  Emily is lucky enough to have a small space in Capitol Hill DC to grow her own basil which in return makes for a tremendous pesto.  Hopefully Josh and I make the list to get a container :) In true Madej fashion, we would love to include pesto with every meal if we could. HAPPY BIRTHDAY EMILY!!

Time: 15 minutes

Ingredients:

  • Pignolis, a.k.a. Pine Nuts (1/4 cup)
  • Chopped Garlic (3 tbsp.)
  • Basil Leaves (5 cups packed)
  • Kosher Salt (1 tsp.)
  • Fresh Ground Black Pepper (1 tsp.)
  • Extra Virgin Olive Oil (1-1/2 cups)
  • Grated Parmesan Cheese (1 cup)

Directions:

  1. Roast your pine nuts at 375 degrees for 5-10 minutes
  2. Mix the garlic and the pine nuts in your food processor.
  3. Add the basil, salt, pepper, extra virgin olive oil, and parmesan cheese and blend until your pesto becomes a puree.
  4. Use the pesto on everything!!!

Spread the Love & Dream Big,

Mrs. Madej


Buffalo Chicken Calzone ... Our Attempt on the D.P. Dough Buffer Zone

Did you have the amazing establishment, D.P. Dough in your college town?  We did at Virginia Tech and the amazing drunk food restaurant was notorious for the  "Buffer Zone", a buffalo chicken calzone that tastes like a slice of heaven - Especially after a rowdy night at Big Al's or an eventful day of tailgating. Unfortunately, I have yet to find a single restaurant in DC that sells anything remotely similar to the "Buffer Zone." Therefore I decided to take matters into my own hands and I made it myself.  Although it wasn't exactly the same, it was still pretty delicious! Hmm... maybe if I make it in advance and snack on it for late night food it would have that same heavenly effect? Side note, I made it with whole wheat crust to convince myself it was on the "healthy" side.

Time: Ready in 45 minutes

Ingredients:

  • Whole wheat pizza dough
  • Chicken (2 breasts)
  • Ricotta Cheese (1 cup)
  • Mozzarella Cheese (1-1/4 cup)
  • Buffalo Sauce (1/4 cup)
  • Blue Cheese or Ranch Dressing (1/4 cup)

Directions:

  1. Clean your prep area.
  2. Preheat your oven to 425 degrees.
  3. Coat your prep area with cornmeal.
  4. Roll your whole wheat pizza dough into a circle until it's 1/2" thick.
  5. Grill or bake two chicken breasts. I like to use my Cuisinart Griddler because it's quick, easy, and doesn't dry out the chicken.  Once cooked, let the chicken cool and cut into small bit size pieces.
  6. Mix your filling and stack it in the middle of your pizza dough
    1. 1 cup ricotta cheese
    2. 1-1/4" cup shredded mozzarella
    3. 1/4 cup blue cheese dressing
    4. 1/4 cup buffalo sauce
    5. Diced Chicken
  7. Fold the dough over and twist the edges to make sure the filling will not melt out.
  8. Cut three small slits in the top of the calzone for venting.
  9. Coat your pizza stone or baking sheet with cornmeal.
  10. Place the calzone on your baking surface and heat until the top is golden brown. (approximately 20 min.)
  11. Let sit for about 10 minutes for the cheese to congeal prior to serving.
  12. Serve with condiments! Extra blue cheese, ranch and buffalo sauce on the side.


Spread the Love & Dream Big, 

Mrs. Madej  


There's No Place Like Home

Let me start off by saying that there is no better feeling then when you expect to pay over 1K for a new air conditioning compressor for your car and then the dealer calls you to say IT'S COVERED BY INSURANCE! Total happiness, smile on my face, and a very relieved wallet :)

I had no problem signing the John Hancock on this receipt!

I had no problem signing the John Hancock on this receipt!

This weekend the residents of apartment 611 made the journey back to the garden state* for some relaxing family time and to participate in the United Way Run for Healthy Kids 10K.  We made a team in memory of Josh's mom, "Pat's Pacers". Some of us paced....(Mrs. Madej)... some of us came in second place for their age division cough cough, Josh, and first place in their age division, cough cough, Jen Meador. WINNING! Big props to Dennis Madej for organizing such a successful event for such a great cause!

Before the 10K at the start line!

Before the 10K at the start line!

10K Complete! - Crushed it!.... and that monster hill which you practically need ski poles to help you climb up - Brittney, Josh & Jen - 1, Hill - 0.

10K Complete! - Crushed it!.... and that monster hill which you practically need ski poles to help you climb up - Brittney, Josh & Jen - 1, Hill - 0.

IMG_1648.JPG

On Saturday, I finally made it to Rails Steakhouse, the new hot commodity in Montville Township! And let me tell you, this place did NOT disappoint.  Every little detail was perfectly executed throughout the design of the space.  The restaurant is built next to the train tracks in Towaco.  Only a short mile from where I grew up, this land was never anything more than wasted.  It has now totally transformed into a rustic, luxury village. (Too bad it didn't look like that when I lived there!) The staff was fantastic.  We went early and they were happy to give us the full fledged tour. Three indoor bars, two outdoor bars, and three levels of dinning options are available along with a private dinning area. We opted to sit outside with bartender, Vinnie.  Shout out to Vinnie for exceptional service, cocktail mixing skills, and tremendous appetizer recommendations.  THE BACON... seriously, the best Jen and I have ever had. AMAZING! Before we headed home we snuck down to the hidden speakeasy. I can't tell you how to get in or it would lose it's mystery. What I can tell you is this hidden basement comes fully equipped with flapper girl waitresses, the full dinner menu, and a seriously great dirty martini.  We tried the Fig & Bleu pizza and it was melt in your mouth good. If I still lived in Montville I would definitely be a regular. Overall experience - amazing vibes and architecture that truly doesn't disappoint.  Props to the owners for putting so much love into this restaurant oasis. We can't wait to go back for a full dinner.

Double Cut Maple-Pepper Glazed Berkshire Bacon - cured and smoked in house

Double Cut Maple-Pepper Glazed Berkshire Bacon - cured and smoked in house

House Made Mozzarella - with heirloom tomato salad and basil pesto

House Made Mozzarella - with heirloom tomato salad and basil pesto

Dirty Martini #2

Dirty Martini #2

Fig & Bleu Pizza

Fig & Bleu Pizza

Overall - Great weekend! AND A BIG THANK YOU TO JUNE AND CHRIS BRENNER FOR BEING THE BEST PUPPY GRANDPARENTS A DAUGHTER COULD ASK FOR! THANKS FOR WATCHING CRUZ THIS WEEK SO WE CAN HAVE A BREAK :) LOVE YOU!

Spread the Love & Dream Big,

Mrs. Madej

*According to our bartender this weekend, New Jersey is called the garden state because even if you only have a 4' x 4' back yard... you grow your own tomatoes.

A Labor Day Birthday Weekend!

It was a bitter sweet weekend. We were not on Cape Cod like we have been the past few Labor Day weekends but we did get to celebrate our BFFs birthday!!!! And if there is one talent Jen Meador has.... it's knowing how to celebrate a birthday! The weekend started on Friday night with a Jack and Coke pregame, an uber over to U Street and dinner at The Fainting Goat. The restaurant was quaint and eclectic. We split up into two tables and decided to order family style so we could try everything. Highlights of the dinner included the goat cheese fondu (we may have ordered 4), the homemade mozzarella from the burrata board, and the beef short ribs. Everything was finger lickin' good. (Including the bourbon and diets which were served in a decent size glass). Mr. Madej indulged in the New Holland Dragon's Milk Bourbon Barrel Stout (ABV 10%) and he absolutely loved it. 

Post dinner we migrated next door to The Cod Mother located on U Street.  This place is our favorite dive bar to sing/scream throwback classics & crush PBRs.  If you get there early enough you can score the front booth allowing for the perfect group jam session and ample room for beer cans.


Josh and I attempted to have a productive morning on Saturday. We woke up early and ran over to PetSmart with Cruz to pick up a last minute birthday gift for Jen.

It is now my pleasure to introduce our newest family member, Crumb! He is a red, male beta fish who is very fond of his new loft bedroom in the kitchen. He enjoys long swims, eating as much as Jen will feed him and his new plastic tree. He does NOT enjoy Star Wars action figures being dropped into his tank. 

Saturday continued with a dip themed cookout down in our courtyard. The menu consisted of three different types of marinated chicken drumsticks, cocktails, and a "calorie free" carrot cake for the birthday girl! Our friends didn't hold back bringing their "A" game which included guacamole, buffalo chicken dip, crab bacon jalapeño dip, and pesto pasta salad with mozzarella balls.  (Some of these will be featured on future blog posts)

Seeing how it was a three day weekend we decided to pretend that Sunday was Saturday and we spent another day on the town knowing we still had Monday to rest up.  So what did we do... BRUNCH OF COURSE!  We tried a new place called Bar Charley located between DuPont and Adams Morgan.  They didn't take reservations but could accommodate our group of 6 in less than a few minutes. Best part about Bar Charley - their $24 bottomless brunch which included your main dish and drinks.  Mr. Madej was extremely pumped to find out their bottomless drink selection included mimosas, bloody marys, bloodys, and BEER!  It was Naragnasett tall boys all around for our group! We happened to know about the specials in advance so we all came prepped with our koosies ;)

Overall - very successful Labor Day Weekend.  The company was great, the weather was perfect, and now we are resting up and back on diets. Cheers!

Spread the Love & Dream Big,

The Madejs


Recipe Box - June Brenner's Green Grape Salsa!


As a gift at my bridal shower most of my family and friends wrote down recipes and gifted me an amazing box full of appetizers, entrees, deserts, and beverages to start our recipe collection.  Josh and I plan to attempt making them all and to post how they turn out here on our blog. First up, a great childhood memory, my mom's green grape salsa. I actually remember this salsa winning a salsa contest one summer camping in Lake George with the Weir Farm Gang.  The best part about making this delicious snack - it's so unbelievably easy.  All you need is 6 ingredients and a food processor (big or small).


Ingredients:

  • Bag of green grapes
  • 2 tbsp. white vinegar
  • Handful of fresh cilantro.
  • 1/4 cup green onion
  • 1 tbsp of garlic or three fresh cloves
  • Chips  

Directions:

Clean the grapes and throw all the ingredients listed above in your food processor. In my 7-cup food processor I use about 80% of the bag of grapes. I fill it all the way to the top to make as much salsa as possible. If you don't have a large food processor, I have made this in a few batches using my 3 cup mini-processor. Pulse for 5 seconds, dish and serve with the chips of your choosing.  Play around with the proportions of the cilantro. If your a huge fan, use more then a handful. If your not the biggest fan you can definitely use less and it will still be delicious.

Tip from Mr. Madej - Use this salsa as a crisp and refreshing garnish to your salad! 

Share the Love & Dream Big, 

Mrs. Madej  

Wedding Reflections

Welcome to our blog! We are so excited to start this new hobby.  With our wedding weekend behind us we decided to find a new activity to fill our time.  Ideas for this page have been filling our brains for a few months and we are so excited to finally put them down on virtual paper. Being engaged was an extremely exciting time but because we were so busy wedding planning we hardly had time to share our experience and take it all in.  In the moment, those seventeen months felt like a life time, but looking back it was a complete whirlwind filled with a lot of love, a lot of budgeting, a lot of crafting, and a lot of exceptional time spent with the people we love most.

Now with the experience being over there is only one thing I truly remember and that is the people who celebrated this amazing weekend with us! That entire weekend was a total blur. I barely remember seeing a centerpiece, tasting the food, getting a drink from the bar, or what songs were played. What I do remember is that the people we surrounded ourselves with that weekend are completely responsible for making it the wedding of a lifetime! The celebration was a 10 out of 10 from beginning to end.  Our group never skipped a beat. You could feel the energy radiating through the entire room all night.   The love and support of our friends and family was contagious and we could not have asked for a better group to celebrate our love.

So here it is future brides - what I think is my biggest piece of wedding advise. When you set your budget...cut the flowers, the cost of all the stationary, and maybe you don't need the expensive seafood entrée... Spend the money on your guest list!  Invite the people you love and who you want to celebrate your special day with! Seriously, invite them all!  Because these are the people who will truly make your day special, the most fun, and who will help you remember all the little details and memories you missed or didn't get to experience.

It's funny watching so many people you are close to meet for the first time and instantly click. Why do you think that is? Well, my personal opinion is that Josh and I surround ourselves with awesome people...and awesome people love meeting other awesome people. So many new friendships were built. Friends who have been out of touch for years reconnected and maybe there was even a new spark or two ;) So if you were one of these people who helped in making that the best weekend ever.. THANK YOU! We love you, appreciate you and are especially grateful that you traveled near and far, sat in traffic, took planes across an ocean or across the country, and hopefully got to fall in love with our special place. We love you! (Should we plan a giant reunion??... I really think so!)

For the wedding, Josh's dad, Dennis organized this amazing photo montage.  It was playing in the background at the bar but in case you didn't have a chance to catch it or didn't attend the big day, we re-posted it here for you to watch. Look out for your picture, most likely it's a total winner selected by your favorite Madej.


Below is a preview of what you can expect from our blog!

  • All things Madej Wedding - How we saved pennies here and there, our amazing vendors, where we got our inspiration, and all the DIY details a bride could ask for!
  • What We Love Wednesdays - Highlighting some of  the various people, places, etablishments or products that we love.
  • Recipes from the Recipe Box - during my bridal shower some of our friends and family filled out recipe cards with things they thought we would enjoy. Watch as we succeed or fail in recreating these amazing dishes. Either way we think they'll taste great! Follow #Madejrecipebox
  • Foodie Fridays - new home creations or meals out we would like to highlight.
  • Spotlight Saturday's- we have a lot of amazing things and people around us. And some deserve to have the total SPOTLIGHT!
  • A personal look into the lives of two awesome newlyweds and all the adventures that we will take!

So get pumped, get ready, and get reading/watching/viewing.  

Be sure to mark your calendars and check back in for our next post, "Recipe Box - June Brenner's Famous Green Grape Salsa" which will be posted Friday morning! (It might just be the perfect complement to your Labor Day weekend barbeque!)


Spread the Love & Dream Big,

Mrs.  Madej