Style: Nautical elegance designed by CoppiaCreativa. Kristy Bauer Saliemo has beautiful designs and I knew they were the perfect fit for our wedding. We wanted to keep it classy but not so formal that our guests would think they were attending a black tie affair. We found the design we liked listed as an invitation package for purchase. I decided to email Kristy to see if she would be willing to sell us just the digital files and she happily agreed. She was kind enough to help us with the invitation wording, agreed to make our response card "post-card" style by adding our address on the back and also designed us a custom details card. Here is the link to our wedding suite design. The total cost for digital versions of the double sided invitation, the double sided response card, and the custom designed details card was $50.
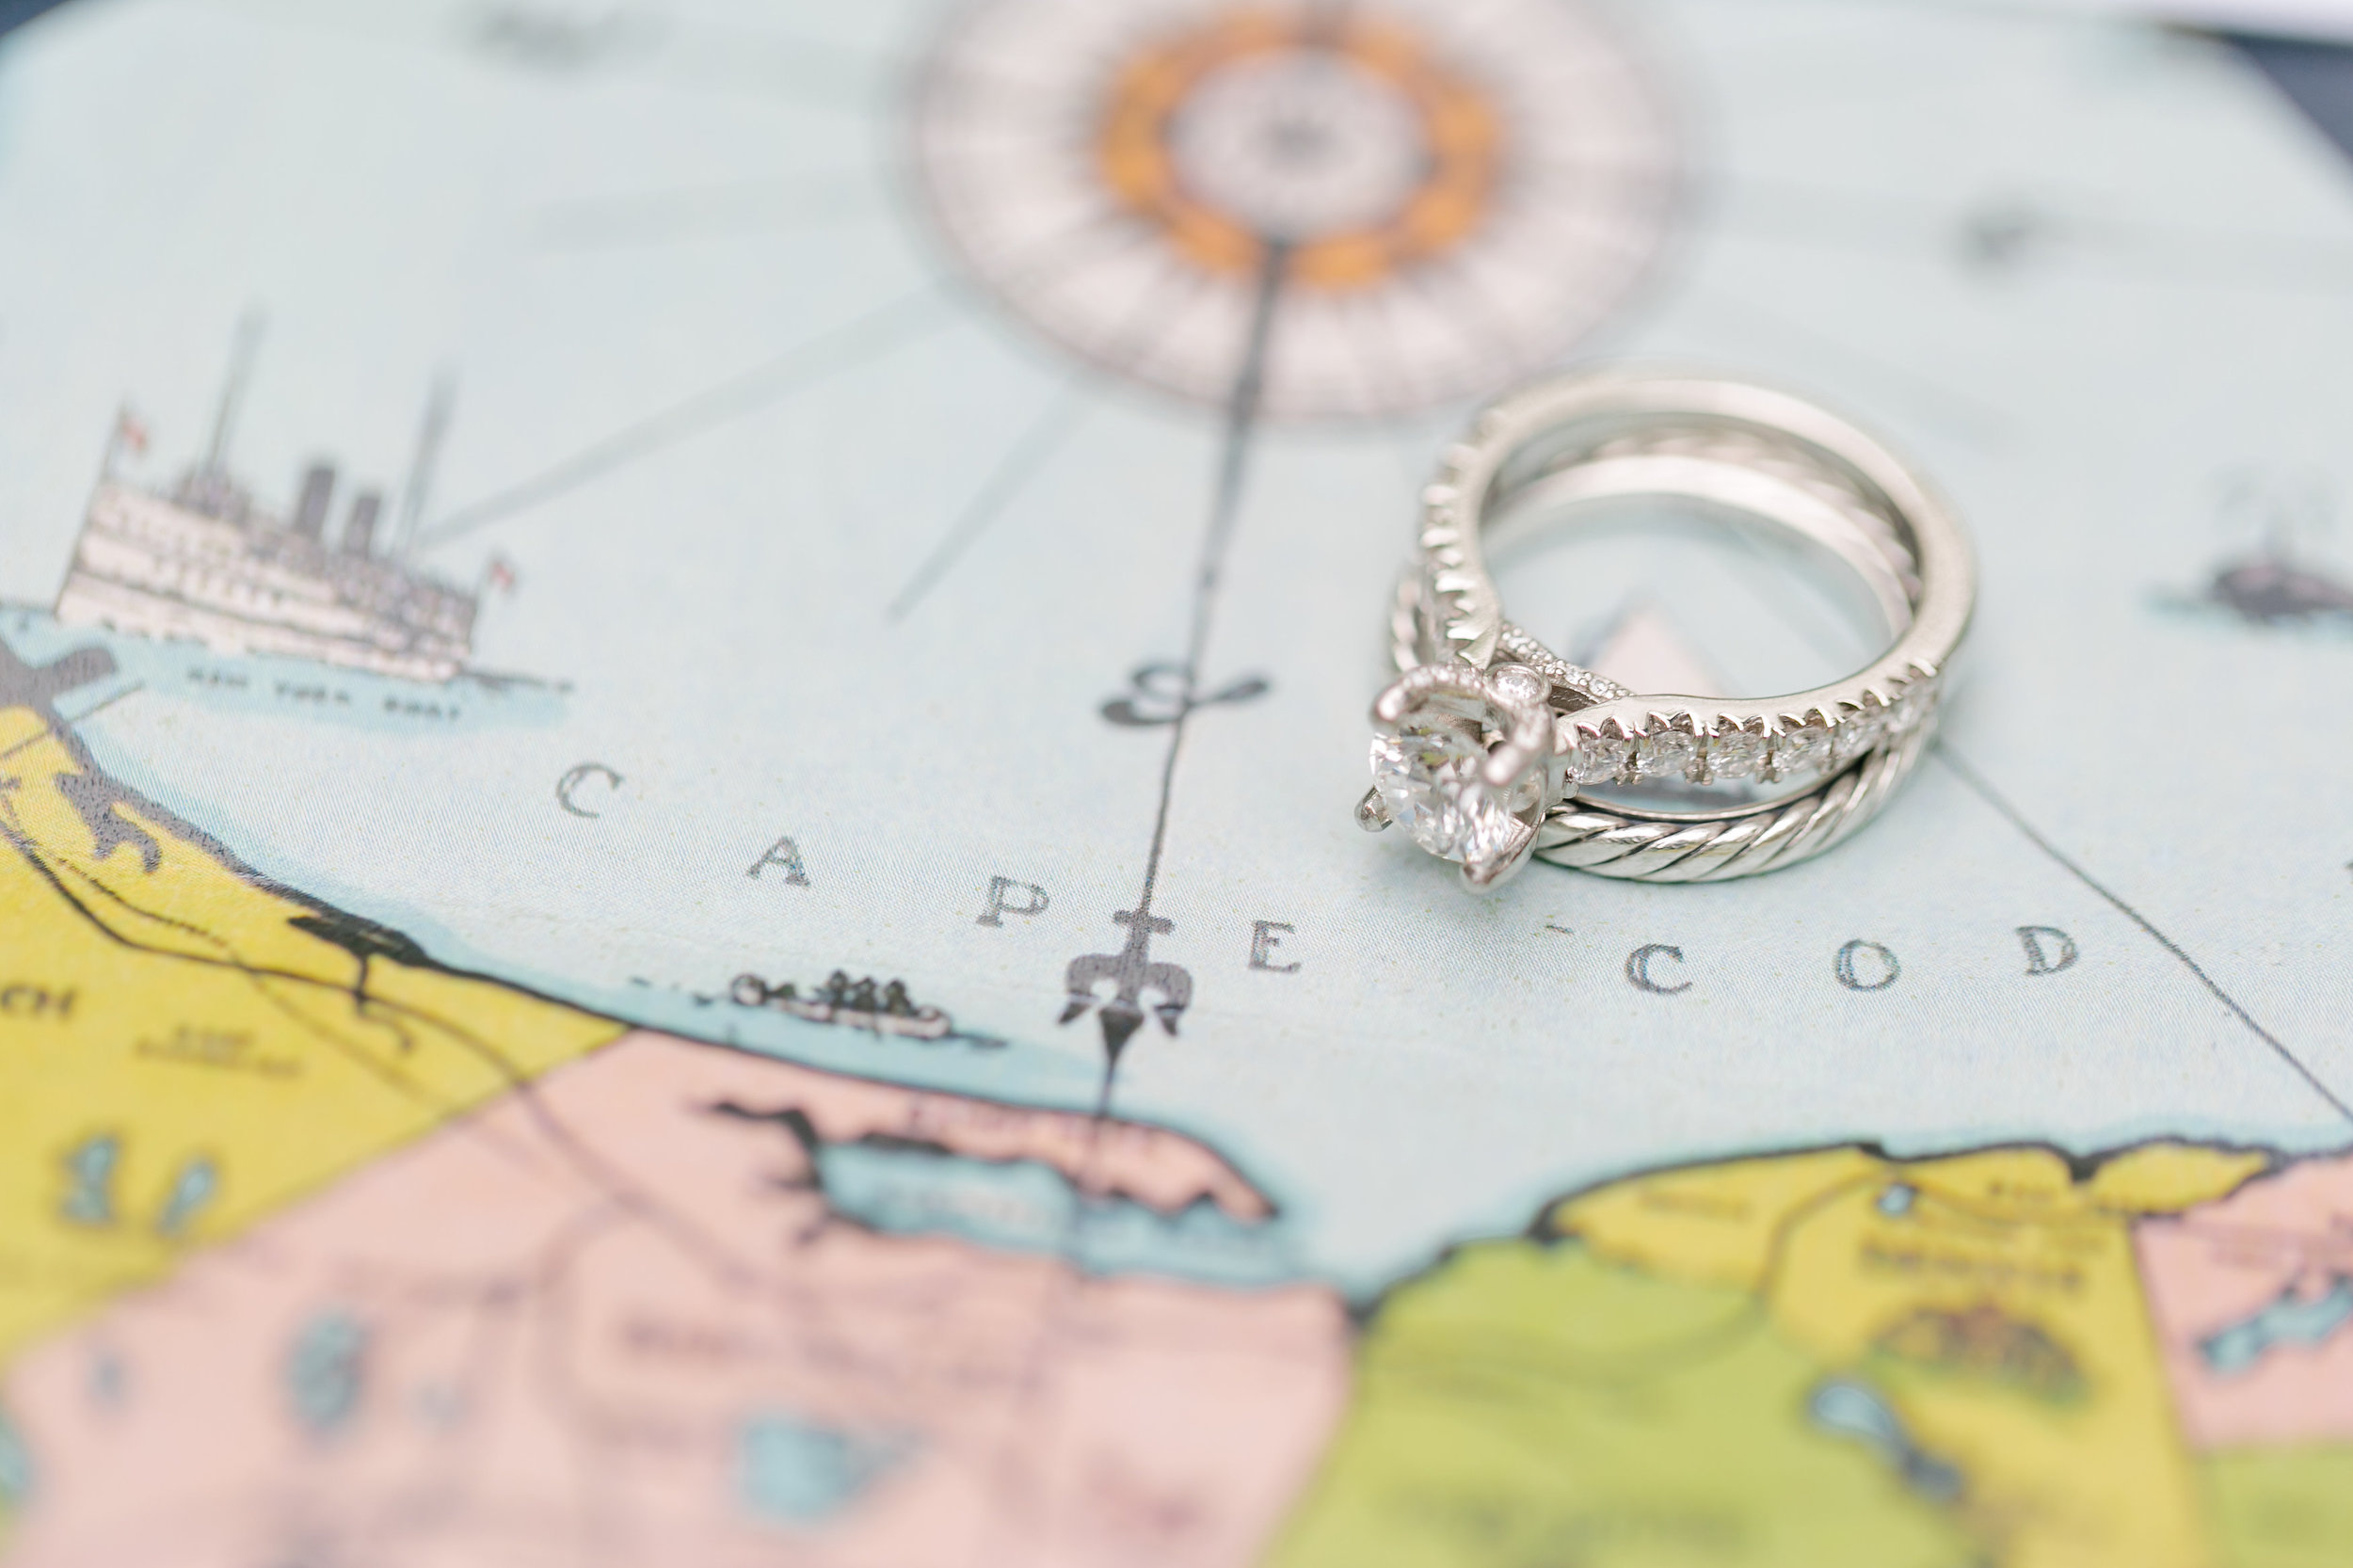
Selecting the Envelop Liner: Using inspiration from CoppiaCreativa's designs on Kristy's page I knew we wanted to use a map of Cape Cod for our liner. Using a quick google search I found the map I liked best, copy and pasted it into a word document and printed it on letter size paper 150 times. The map is of Cape Cod, as drawn by architect Walter Gaffney in 1932. I printed them using a color laser printer on standard white printer paper for free!

Printing: The next step was to find a website to print the three invitation components. With some help from family friend, Craig Hartmann we found a paper we liked that had a decent paper weight and it was all systems go. We knew we wanted linen paper to provide a casual texture to the elegant font and after ordering paper samples from multiple companies we chose to use 123 Print. They had the lowest cost with the best 110# textured linen paper selections. The 110# was heavy enough to feel substantial but not as thick as a piece of cardboard. We were able to upload all the digital files easily onto their website and place the order without any assistance. For the wedding invitation we used the 5-1/8" x 7" custom wedding invitation option. For the response and details cards we used the 5-5/8" x 4" custom postcard option. We also received 40% off during their wedding invitation sale and 10 days later we had all our invitations in the mail! Total cost for 150 copies of each component came out to $252.00.
Envelopes: Next step - envelope upgrade! The invitation order from 123 Print included more basic white envelopes than we knew what to do with. I knew we wanted to hand calligrapher the addresses in gold and we agreed that using a navy envelope would really make the design pop. After some time searching for a great deal we found our envelopes from Paper and More. We selected the A-7 Euro Flap, Dark Blue Metalic envelopes. The cost was $16.99 for 50 and we ordered 3 sets for a total of 150. I knew we would only send about 110-120 invitations but having 30 spare envelopes was well worth it. While addressing them by hand I made multiple mistakes and had to trash my fair share. By the end I only had one to spare!

Cost of Invitations:
Digital Design: $50
Printing: $252
Envelopes: $51
Liners: $0
Total Cost for 150 Wedding Invitation Sets: $2.35 each
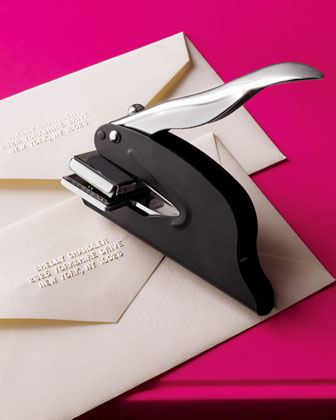
Embosser: We purchased a very simple address embosser to use on our save the dates and our wedding invitations. One of my bridesmaids, Taylor Berens Crouch recommended this great deal through Horchow. It worked great with the A-7 type envelopes and added the perfect additional custom detail.
* Madej Tip - if you want to emboss your envelops make sure you do this step prior to gluing in your envelope liners :)
Inserting the Envelop Liners: This process was simple but time consuming. Take your envelope, trace it onto one of your liners, cut it out and glue it into your envelope using a glue stick. I wanted to position the compass centered into the top of the envelope so once I had the map positioned correctly I made a stencil to trace all the other maps. Josh helped trace and I used my steady hand to cut the straight lines. To streamline the process I cut the bottom off all the maps using my paper cutter and made sure the liner extended past where you could see it with the envelope fully open.
* Madej Tip - Glue the liners in after your calligraphy is complete. It took me over a month to finish hand addressing and the few liners that I had glued in started to separate from the envelope. Additionally - you don't want to waste cut out liners on envelopes that you trash due to mistakes.
Paint Pens: For our save the dates I bought gold paint pens from target but they ran out quick, they were expensive and occasionally if pushed down hard enough would bleed in large spots. I eventually found that the best gold pens to use were actually Sharpie! Sharpie Metallic Fine Point Permanent Markers. You can find them on amazon for $4.50 for a 2-pack.

Font for Hand Calligraphy: The cursive font used in our invitations is called Burgues Script. To buy the font is pretty expensive. I couldn't find it for under $100. So instead I used this website as I addressed each last name. http://www.sudtipos.com/fonts/97 . You can "test" the font by typing each name and Sudtipos will digitally show you what the letters will look like. See the example I screenshotted below. After that... its up to your awesome free handing skills.


Stamps: I've never really loved the idea of "wedding" stamps. A standard white cake or red roses - none of that really fit with our theme. At the time the post office was offering beautiful New England lighthouse stamps. Each one was breathtaking and totally put the icing on the cake as the finishing touch on our invitations. If the post office isn't selling a design that fits your invitations, try Ebay.
* Madej Tip - Stamps are expensive. I did everything I could to make sure our invitations only needed 1 standard stamp. Forever stamps are $0.49 each. If you are going to mail 100 invitations it will save you $50 just in stamps so make sure your invitation weigh less than one. (Don't forget you also have to put a stamp on the return card so it really starts to add up!) To save paper and to get below the weight limit, Josh and I opted to have our response card - post card style, eliminating the need to include an additional envelope. We also chose to forgo the traditional inner and outer envelopes. We addressed straight onto the envelope we inserted the invitations into.

The end result was beautiful and we received so many compliments on how it all came together. In furture blog posts you will see how we included the Burgues Script throughout more of our wedding stationary to make everything look cohesive and beautiful.
Spread the Love & Dream Big,
Mrs. Madej